Friday, December 30, 2005

"Champagne Bubbles" - My New Year's set


"Champagne Bubbles" is the name of the jewelry set I'll be wearing to the New Years "Eve Eve" party at the Dickson Gallery of Fine Art here in Jackson, TN tonight. If you're in or around Jackson, stop by the gallery from 7-9 tonight and say hello!

Click on the photo to see a larger version or go here to my website page which highlights these pieces.

This set is also the subject in my first jewelry tutorial, released this morning! Click here to to read about the Single Cell Cloisonne tutorial and learn how to make this type of jewelry design yourself!

Jai

Wednesday, December 28, 2005

Free Bluebird Demonstration!


Over the past 24 hours, I've been working on getting the "Lessons" section set up on my website. Some of you have seen this bluebird demonstration in HTML format before, but I have now turned it into a PDF format and have uploaded it this morning into my Lessons category as a FREE download in order that visitors can see the format of the lessons I'll be offering for sale.

You are welcome to go here and download this demonstration. It's not a "full" tutorial with a pattern(s) as the paid lessons will be, but you still might find this demo helpful and I've included a couple of TIPS in this download you might find useful. :)

Jai

Tuesday, December 27, 2005

Diamond Cross, Cloisonne Art Pendant


"Diamond Cross" is my latest creation. This art pendant features 4 sections of wire embedded into the design, and all are filled with bright colors and then offset by the background which I created in black. Despite the fact I was interrupted by the thought of a potential house fire (see post below) while I was working on this piece, it still came out okay and I think I'll wear this to the New Year's Eve Eve party (Dec 30) at the Dickson Gallery here in Jackson.

I've also been doing some thinking over the Christmas holiday. Many of my polymer clay associates as well as my jewelry making friends have been asking me for another ebook on how to make the type of pieces I'm creating now. (My previous ebook is on creating miniature paintings in polymer, which can be applied to jewelry items...but I've been asked numerous times for more ebooks/tutorials on making specific jewelry items).

I have good news! This year, I've decided to create numerous tutorials on how to create specific jewelry items using my techniques in polymer. Each tutorial will focus on the creation of one specific type of jewel, and of course, students can alter the colors and embellishments to suit their own desires.

All tutorials will be available for download in PDF format and will be only $7 each. Each tutorial will include step by step photos and detailed instructions, as well as suggestions and tips for alterations to the piece should the student decide to make several items with different looks from the base lesson. Patterns will also be included with the tutorials.

As soon as I finish putting together the first lesson, I'll have it up in a special section in my gallery titled "Lessons". I hope to produce a variety of lessons this year, giving students a host of beautiful, unique jewelry they can make using polymer and other simple, easy to use supplies and materials.

So that's one new thing on the agenda for 2006, in addition to creating the many one of a kind art jewels I love to make! :)

Jai

Fire!

Last night, I'm down in the studio working away on my latest pendant. I have the music on, everything's going smoothly. Life just couldn't get any better.

My daughter comes downstairs - I thought she was just coming down to check out my work, as she often does. She says "Mom, I smell something like a burning smell." I figured she was just smelling a hint of the polymer - as it does put off a little odor sometimes when it's being fired. She becomes insistent though, so I get up from the table and follow her up the stairs. As I reached the top of the stairs, I smell it too!

The first room I enter is the laundry room, and the dryer had just been running. So I check that out - no signs of anything burning, yet I still smell this unpleasant scent. I walk through the kitchen, into the living room, and head straight for the Christmas tree. It smells stronger over there. I shut the tree off, and check things out. Still no sign of anything unusual.

I head down the hall toward the bedrooms - the smell seems to intensify and at this point, I feel my heart slide from my chest into the pit of my stomach and then my nerves begin to get really frazzled! A quick look into all 4 rooms reveals nothing, so I grab the attic pulldown string and tell my son to get a flashlight, quick!

I pulled down the stairs and head up into the attic - it's cold up there and as I look around, I don't see anything, and then I realize I don't smell anything up there. So I head back down, closing the attic door, and as soon as I get back on the hall floor, I smell the scent strong again. "Where is this coming from?" I'm saying to the kids as we all move through the house.

At this point, I'm beginning to get REALLY scared - the thought of a potential fire is terrifying enough, but the thought that I can't FIND IT was even more frightening! I decided to breeze through the house one more time before heading outside, thinking maybe it's something on fire outside. As I get into the kitchen, the smell is worse and then I heard a hissing...a popping, crackling sound. I freeze and I put my hand out behind me to get the kids to stand still and I quiet them.

The sound was coming from the dishwasher (which had been running). I gently pull open the dishwasher door and we were bowled over by this burning smell - yet STILL no smoke or sign of fire. As I shine the flashlight in there and look around, I am very puzzled. There's no sign of anything, yet we hear the popping and crackling and smell that awful scent. My son yells out "It's electrical!" and he runs to the other side of the kitchen.

I bend down low, and shine the flashlight UNDER the dishes on the bottom rack and then I spot the culprit. My nerves immediately eased as I stood up and said "I've found the problem and it's not a fire." The kids, wide-eyed and standing back, ask what it is.

"It's a plastic measuring cup sitting on the dishwasher element, and it's melting," I explain. "I can't get it out until the element cools, so just leave it open and let it cool." Of course by now, the smell had REALLY permeated the house since the dishwasher was open. I don't believe I've ever smelled burning plastic before - and let me tell you, it's not pleasant. But I'd rather smell that and deal with that than a real fire!

The paranoia which soared through my system during this event was unreal...I've never experienced anything like that, and the thought of a house fire was horrible! I'm grateful it wasn't a real fire. I can certainly relate now to the fear which can occur with a real fire and the whole ordeal made me think over our fire escape plan for our family in the event it should ever be necessary.

Jai

Monday, December 26, 2005

Christmas Blessings

What a wonderful year full of blessings we've had. I am so grateful to all the friends and family who have supported me this year.

Our family had a lovely Christmas. My son and daughter were thrilled to get some of the things they asked for this year, and we were excited to have a wonderful family dinner...it was all quite different from last year and I'm glad we've been able to recover from some hard times which seemed unbearable.

One of the things my daughter received this year was a basic digital camera. Now this camera is nothing fancy (2.1 megapixel), but for someone just learning, it's perfect! She was practicing taking photos and I wanted to share this one she took today - I believe we may have yet another fabulous photographer in the family! Take a look at this beautiful shot:

First of all, from what I've seen of this camera's pictures, I'm shocked this came out of it! LOL Second of all, I think she picked a terrific color shot here with this - she said the sky was so blue - which it was today - and it "looked neat behind the tree". Cool. Not bad for 12 years old! She's looking forward to taking photos of the horses at the stables and to having me take shots of her riding.

My son received some neat little remote control cars called "Zip Zaps". They are so adorable, and go SO FAST! He also got several accessories and a carrying case - so hopefully everything will stay in one place! LOL

All in all, it was a terrific day and it was great to see the smiles on their faces.

Today I've gotten back to work with a new cross pendant design I've been working on. I have 2 new cross pendants I'm designing, and these will be able to be "repeated" designs as far as the base, but colors and layers in each will be different. The first pendant is firing now and I can hardly wait to see it after it's done. I think I'll wear it to the New Years Eve bash at the gallery this weekend.

Jai

Friday, December 23, 2005

"His Majesty", Designer Cloisonne Lion Necklace


My brother often sends me photos of "big cats", as he knows I love them. Being a Leo, the lion is my favorite, but I also like all the other big cats and you'll often find them appearing in my jewelry designs. Well, Scott sent me this photo he shot of a lion profile recently, and I decided to design a cloisonne pendant using this lion profile as the basis for my design, which is below:

The lion pendant was extremely fun to work on for me. Each individual wire was hand formed to create the profile design. I had already decided on a blue background, knowing it would look good with his amber and terra cotta colors. At the last minute, I decided to add a tiny gold lion pawprint into my design, so it's right in the center of the blue, adding just that extra amount of rich detail I was looking for.

I created spiral wires which are embedded directly into the pendant. Then I made a brass wire frame for the pendant, and utilized this side spirals to insert the wires through. I wasn't quite sure how that was going to work out, but it turned out beautifully!


For the chain, I hand fashioned individual links using some rare vintage lampwork and crystal beads I had been saving for a special project. To soften things, I added tiny glass based simulated pearls.

All in all, I am thrilled with how this one of a kind design turned out! To read more about "His Majesty", please click here.

Hope you like him! Comments welcome!

Jai

Tuesday, December 20, 2005

Memories


With the holiday time here, it's certainly appropriate to be thinking of times past. In "Memories", I've created the cool look of winter offset by rich red, representative to me of "heartfelt memories". In this pendant, I've used some aurora borealis - I love the sparkle of it and was actually thinking about New Years Eve while I was working on this, and the sparkle and joy of holiday parties. And I don't know about you, but when I look at the finished design, I see the slight pattern of a tuxedo - though that was not my intention when designing the jewel! It's interesting how these pieces can take on a life of their own and become what the eye wants them to...:)

All weekend, I spent thinking of what I've done in 2005 and where I want to go in 2006. You might notice my banner at the top of the page is different - that's because I'm changing my look and my designs for 2006, and I'm preparing my website now.

I'll be making 4 different types of jewelry - pendants, necklaces, brooches, and rings. I'm going to focus on the cloisonne style of work this year, because I find it incredibly challenging. The majority of the work I produce will be the pendants, necklace and brooches. Rings are something I am personally passionate about, and plan to make a few of, but the main categories on my site being filled with new jewels will be the pendants, necklaces and brooches.

My brother sent me a beautiful lion portrait photo, and I'll be doing a centerpiece for a necklace design based on that picture. That's my next project after I complete a custom cat pendant I'm working on.

As for Christmas, I'm sort of ready. LOL I'm running a bit behind, but then that's normal for me. I still have a few small packages to get out in the mail this morning before I get down to the studio.

It's turned bitter cold here again, and once again, it's giving me headaches. Someday, I'd love to move to an area where it's warmer year round!

Off to work.....thanks for stopping in and seeing my newest jewel!

Jai

Saturday, December 17, 2005

THOUGHTS


I've titled this newest cloisonne pendant "Thoughts". My 'thinking' when creating this piece was that our thoughts have colors associated with them. I've tried to portray the range of colors in this abstract design using the cloisonne method.

For more information about cloisonne and its history, see my previous post.

To learn more about this jewel, or to purchase the pendant, please click here.

Jai

Some Facts About Cloisonne

Some interesting facts about cloisonne, from an article: Cloisonne Primer, History of cloisonne technique
by Woodrow Carpenter

Cloisonne is a French word meaning to be compartmentalized, be cut off from one another, to feel cut off, or shut out

Researchers agree the technique originated in Egypt prior to 1800 B.C.

The word cloisonne is used to identify the technique as well as the finished product. The cloisonne technique does not presuppose the use of enamel.

The reason or function of the wires is an age-old subject for discussion. "Originally, the reason had to do with the goldsmith being accustomed to making sockets for jewels out of upstanding strips of metal soldered on and afterwards bent over the edges of stones to hold them in place. He was in the habit of soldering on cloisons for mosaics of precious stones and glass inlays. And, perhaps the patron would not accept it any other way. Later, the artist would see the value of the metal line and take it into account in the design. The artist continues to do so even though, today, the wire serves no other function."

Shrouded in mystery, cloisonne is considered to be the most intricate and difficult of all jewelry techniques. (which explains why I want to do this type of work.....I love challenges!)

Friday, December 16, 2005

Iris in the Snow


Iris in the Snow, Cloisonne Pendant in Polymer by Jai

Imagine an Iris, its petals full of rich purple sheen while its center glows bright with golden hues, bursting forth through the pearly, pale blue wisps of winter wonderland. Add a dash of green and a square cut amethyst rhinestone embedded in the design, and you have a piece of floral jewelry offering true elegance in its unique, artistic form. Iris in the Snow is made using a cloisonne enamel technique with brass wire and matching bail adorned with two ivory glass simulated pearls. Signed Jai on the back of the polymer pendant, this will make a superb addition to any jewelry collection!

To buy Iris in the Snow for yourself or someone special, please click here.

Jai

Thursday, December 15, 2005

My fascination with enamel work has led me to something new!

About three years ago, when researching jewelry, I discovered the beauty of artisan enamels. To the left is a pendant I saved a photo of, and I've looked at it longingly ever since. After my one year of painting solely with polymer, I decided it was time for me to try to replicate this technique using my own methods.

The pendant to the left is priced at just under $700. Many pendants I see like this are priced at close to $1,000. Of course they are made with real gold, and glass, and the process is very labor intensive - therefore the high pricing.


Using my techniques and my polymer, gold leaf, and gold filled materials, I created this "cloisonne enamel" look pendant. I knew when this baby came out of the oven for the first time last night, I was in LOVE with what I've come up with here! Of course, it took numerous "mistakes" along the way to figure out what I was doing wrong and right. Even with this piece, I've noted something I will change with the next piece I do in this manner. But it's minor, and doesn't affect "the look" which will be appearing in my 2006 pieces.

About This Jewel

(click the photo to see a larger picture)

Cloisonné is the oldest method of enamelling. First practiced by the ancient Egyptians, cloisonné enamelling has been embraced by many ancient and modern cultures. Here I've replicated the process of cloisonne enamel work in polymer. First, I created a setting, adorned with genuine gold leaf on the edges. Then I've built a network of "cloisons" (cells or compartments) by forming 14K gold filled bezel wire into a pattern for the center of the pendant. Each "cell" was then painted using tinted polymer, filled gradually until I obtained the shading and coloring I wanted, with multiple firings in between layers. A brass bail accented with freshwater pearls is suitable for any chain, jewelry cord, or ribbon.

For this design, I selected rich colors of cobalt blue, several striking shades of amethyst, and a bit of apple green. In the center circle, I've used three shades of red for the "heart" of the pendant. A glass based simulated pearl accents the bottom.

Using this method, it is possible to create a variety of artwork with the bezel wire. Although my materials are much less expensive than "real" enamel jewels require, the time spent on a pendant like this is very labor intensive. "Heartbeat" has an abstract design - very geometric in nature. But I plan to create actual "pictures" once I get more comfortable with the feel of the bezel wire. Right now I plan on creating some more pieces like this, with a geometric design to them, but plan on adding actual imagery very soon!

Jai

Tuesday, December 13, 2005

Wire hell!

Yes, you read that right....Wire Hell. There is such a place, and I have been there this morning. UGH.

Normally I use brass wire for my projects. I also use gold-filled, but since that makes my prices about twice as much for what I currently charge for an art jewel, I have recently been sticking with the brass (gold colored wire) for my projects to keep pricing lower for my customers.

Different brands have different looks. I don't know what brand our Hobby Lobby is, but I hate the look of the metal, so I won't use it. Another store here actually carries a brand which has a very nice golden color - but I can only use one of the gauges they carry, then I have to move up to a thicker gauge I don't like.

So I go online to Fire Mountain Gems to order the Colourcraft wire, which is available in the gauge I need. I also love this brand - the gold color is very rich and elegant. So the webpage for the gauge I want shows a SPOOL and says SPOOL in the text. Last time I ordered this gauge of that wire from them, it didn't come in a spool - it came in a ring, clipped with two plastic clips which had to be cut off....and what happens when you clip them off and unravel the wire ends? This "ring" of wire EXPLODES and goes everywhere. Which is why I wanted it on a SPOOL.

I thought maybe that last time was a fluke...I looked carefully to make sure the page said SPOOL - it did. And I need quite a bit of this wire for this year's projects. I was planning on ordering a large quantity - but - remembering my previous experience, I decided to order just one for right now and see if it came on a spool.

Well it didn't, and I opened the package this morning, and within 3 seconds, I was sitting in a pile of wild wire which had exploded - again. I proceeded to spend the next 45 minutes untangling, and then spooling it myself onto an empty spool I had here. What a mess....it was truly wire hell!

This is one of those moments I tend to rethink what I'm doing and wonder why do I put myself through this? LOL

The good news is yesterday was productive - I've come up with a bold necklace design I'm pleased with for the 2006 Impressions line. I'm still working out the best way to do the bails on my pendants though. Maybe today I'll figure that one out! Now that I've had my wire emergency today, surely the rest of the day will go smoothly.....one would hope!

Jai

Monday, December 12, 2005

Nature's Web Brooch/Pendant Combo


As promised, here is my large medallion style brooch/pendant combo featuring my Nature's Web abstract art design. The art cab here is set in a large oval bezel, and the mechanism on the back allows this gorgeous art jewel to be worn as a pin or a pendant. Picture this at the base of the neck on a simple neckwire - what a stunning statement that will make! Better yet, add as a pendant to a beaded necklace design and you'll have a fabulous, bold piece of art on the neck. The only thing different from this art cab compared to the ones below is I've added a splash of royal purple into the design.

Jai

Sunday, December 11, 2005

I did it I did it!!!!!

Okay, so I'm just a TAD excited! You don't know HOW LONG I've been striving for a unique ring design which I adore....well I've finally created it! Despite the fact I had another terrible headache when I woke up today, I managed to get very creative and come up with this design.

The pattern on the art cabs shown here is called "Nature's Web". The ring is hand sculpted in brass wire, has a large pear-shaped art cab, prong set, and freshwater pearls for accent. It's a ladies size 7.25.

The pendant to the left features a similar pattern, using the same coloring, yet it's different since each of my pieces are original art and freeform. I created the pendant smaller in order to appeal to someone who likes the more delicate and demure look. Like the ring, it is sculpted in brass and features freshwater pearls for accent.

Also in process is a large, oval medallion style "Nature's Web" brooch/pendant combo jewel. I'll post it later when it's complete. It will be my first brooch in the new Impressions series.

I'm just SO EXCITED I figured out my ring design and it worked! To read more about the ring, go here. To read more about the pendant, go here.

Jai

Saturday, December 10, 2005

Lapis Elegance Cuff/Bangle Bracelet & Earrings

Over the past couple of days, I've worked out my bangle/cuff bracelet design I'll be producing in the 2006 Impressions line of art jewelry. I call it a bangle/cuff, because it slides over the hand and onto the wrist like a bangle, yet looks like a cuff bracelet with that large centerpiece. It looks wonderful on the wrist, and I'm very pleased with the design I've come up with. I'm going to make a few more this year with the large center "stone" and some with smaller, more delicate centerpieces as well.

I titled these pieces "Lapis Elegance" as my design has the look of lapis lazuli. I added gold leaf in both the bracelet and earrings for more sparkle too. The earrings I created are pierced. I also have another earring design I'm working on which will also be dangles, but will have larger artistic centerpieces in them. So I've got this one bracelet design for the line, I'll have 2 earring designs, and I'm working on my necklace and ring designs as well. Once I get everything worked out, it's time to start making more with abstract art centerpieces in a wide variety.

Here are the earrings. They are SO FUN! :)


A friend of mine showed up this week to visit after a couple month absence. He was very impressed with the new pieces in this new line of 2006 jewelry. But I thought he was going to fall onto the floor when he saw this piece! His comment was:

"Man! That is really something! I knew you were a good artist but I had no idea you could paint like THIS!"

I sure liked hearing that! It almost took away the pain of my headache. :)

Jai

Thursday, December 08, 2005

Winter Dance... a splash of festive color!


A couple of weeks ago, at the gallery art party I attended, I met the most beautiful woman who wore a stunning cream colored, feathery-style winter suit and matching fluffy hat. It was a totally smashing outfit - it just needed one thing...a piece of art jewelry to add just a tiny splash of color to the overall look, and bring out the blue in her eyes better. "Winter Dance" was created with that memory in mind.

More details about this one of a kind jewel can be found here.

Jai

Wednesday, December 07, 2005

The Master's Garden


How's this for colorful? :) I think I used every color in my palette in this design! I've titled it "The Master's Garden", after Monet's garden, because of all the colors and patterns.

Jai

Fiery Sunset Designer Art Pendant


I have two new pieces coming out of the studio today. This is the first, titled "Fiery Sunset". This abstract design features a vivid display of colors including cardinal red and burnt orange with a deep purple base, emerald green, and golden yellow, in addition to genuine gold leaf. A sensuous royal blue peeking through adds nighttime elegance, as do the faceted black onyx crystal bead accents.

"The Master's Garden" will be uploaded next - I'm waiting on the glaze to completely dry before it's handled. Today I'm working on another one titled "Winter Dance" and I might get that one uploaded before tonight...depends on how things go in the studio!

On a side note, we are supposed to get SNOW today! Yes, in West TN. I guess it's appropriate for me to be working on a winter piece during this kind of weather. Right now, the sun is shining brightly, but it's cold out.

Jai

Tuesday, December 06, 2005

Forest Splendor, An abstract art pendant with gold leaf


Forest Splendor, the first pendant in my 2006 Impressions line of art jewelry.

I wasn't going to do abstract...I was going to focus on more realistic work because to me, it's more challenging. But after doing this piece, I've changed my mind. :) This particular abstract was just as challenging - everything carefully planned and executed, including the hand-wired setting. I'm very pleased with the design and have decided my pieces in my 2006 Impressions line will be created in this fashion....abstract designs in intricate hand-fashioned settings.

Read the details about this pendant here.

Jai

Monday, December 05, 2005

My amethyst angel


This morning I finished up this pendant I've titled "Amethyst Angel". This new way of doing settings is working well! Most wire sculptured work is completed by having a finished stone, and sculpting the wire around that stone. In this case, I pre-made the setting, leaving the top cross wires loose. Then I made my art cab to fit the setting! A little backwards, but it worked well. I never know how much wire I'll need to cut to use on a piece when the stone is already complete....so by cutting the wire and forming an acceptable setting first, and THEN forming the cab, I don't have to worry about that issue.

Go here to see more about Amethyst Angel.

Jai

Sunday, December 04, 2005

New Work: Christmas Angel, Original Designer Art Pendant


New from the studio! A unique designer Christmas tree art pendant featuring my original painting "Christmas Angel" in polymer on a hand-fashioned translucent polymer cabochon. I've free formed the brass wire tree as a sculpture base for the cab, and added 3 ruby red aurora borealis crystals as dangles, offering a graceful and sparkling movement to the piece. Go here to read the full description or to purchase this one of a kind jewel.

Jai

Friday, December 02, 2005

Unique cross pendant


I dreamed this pendant design last night. After completing the butterfly pendant (below), I began thinking more about incorporating my original art cabs into my wire sculpture jewelry work. I'd kind of gotten away from that while I worked on perfecting the process I use to create my pendants and cabs. Well I guess it was heavily on my mind last night and I began working on this first thing this morning! The cab is tiny - only 3/4" x 1/2" in size. That's SMALL for me. It was very tedious work, and I'm just thrilled it turned out and that my pattern for the wire cross worked as well. I plan on doing more of these! This one is in my gallery now.

Jai

Wednesday, November 30, 2005

EMERGE art necklace for the butterfly challenge


The creator came down to Earth on a rainbow, in order to bring a message of peace to all humans. And at the very spot where his foot touched the ground, the stones came alive and the sparkling colors of the rainbow emerged with a brilliance unsurpassed.

EMERGE is the title of my art necklace designed for the "Emerge from The Cocoon" Butterfly challenge. I designed a special stone-shaped cabochon, featuring the look of opal and a fair-haired maiden, basking in its glow as she proceeds to emerge into life as a beautiful, successful, and talented woman. This original painting is created solely in polymer in a fashion similar to enamel work. The art represents the changes I personally have gone through as I've transformed over my lifetime, and is representative of the changes many women after me will make, and the journeys into finding ones true self others before me have done.

The art cabochon is framed in 14K gold filled wire, which forms the setting for the cab as well as the wings of the butterfly. Rare aurora tinted milkglass vintage beads, emerald green glass beads, and three exquisite pink ab special cut vintage crystals form the intricate beaded part of the design. The pendant hangs from a goldtone 18" mesh chain.

I chose to create the look of opal in this piece because opals are like human emotions - always experienced different and anew each time they are viewed. The opal is one of my favorite gemstones. The art cab is stamped with my official signature on the back.

To see a close up view of the pendant, please click here.

Jai

Tuesday, November 29, 2005

WAITING FOR SANTA - #4 in the 100 Fabulous Felines Mini Art Series


"Waiting for Santa"
#4 in the 100 Fabulous Felines Series of Business-card sized, original polymer paintings

"Okay, Girls, here's the deal...we're going to miss out on Christmas table scraps while that big, ole' ugly dog gets 'em all. All we'll get are those nasty treats from Santa. So here's the plan. As soon as you see the big guy's sleigh, run and hide. After he's outta here, grab those treat bags and stash 'em under the couch. At dinner tomorrow, you two give out your best meow's and do all the feet rubbin' you can muster. The Misses will feel so sorry for us, she'll definitely divide those scraps up and fix us a plate. And don't forget to toss a big smirk Fido's way before we start munchin' out. He'll never understand it, but he'll wonder about it for a whole year!"

(click here to buy this original painting or click here to bid on this painting on Ebay. Also, purchase cards and fine art prints with this artwork here.)

Jai

Sunday, November 27, 2005

Lunar Offering - Fantasy Centerpiece


This is one of my pieces I call 'Freedom' pieces. I've been so busy this week, I haven't had time to get much new work done. So when I've been out of the studio for a day or so, it takes me a while to get back "in sync". A freedom piece is design made totally "on the fly". No planning, no photo references - just straight out of ME. This is what came out today - I've titled this piece "Lunar Offering". It's a flat, stone-shaped piece, with no hardware attached. I have a lot of jewelry designers as friends, and I thought it would be neat to see what one of them can do using this as a centerpiece in a wire wrap or seed bead design. Alternatively, because it is flat, it will also look great simply displayed as a piece of miniature art on an easel.

Now that I've completed this piece, I'm ready to tackle a more tedious design such as #4 in my cat series of miniature paintings.

Jai

Saturday, November 26, 2005

A festive art jewel ~ miniature painting - POINSETTIA


Here's a festive art jewel I made this week - a beautiful red poinsettia Christmas flower. I created the flower on an ivory background with dots of liquid gold throughout the ivory, offering a very rich and elegant look. Pair this pendant with a black cord (shown, but sold separately) for a casual look or a gold chain for an even more sparkling appearance. This is a one of a kind, signed, original, which can be worn as a pendant or hung on an ornament stand as miniature art in the home. Go here to buy this piece now!

Jai

The Arti-Versary Party at the Dickson Gallery!

Last night was the one year anniversary celebration for the Dickson Gallery of Fine Art in Jackson, TN, where I am a member artist. It was a majorly fun event, with tons of visitors and I met so many nice people! Rachel did a fabulous job with everything - two beautiful girls were playing violins inside and there was a saxophone player outside. There were good drinks and lots of great foods. Two of my pendants sold and I have some requests for some other pieces too. Overall it was just wonderful, and I was so excited to be able to attend and meet and greet!

Also, Rachel put up the photo from the Puttin' on the Pink event where my breast cancer awareness necklace was given away. Click this link to see the article and a photo of Rachel and I in VIP magazine.

The winner of the pendant came to the party last night and was wearing the special necklace. I got to finally meet her and it turns out her daughter is a breast cancer survivor. How appropriate the necklace went to a family where it has special meaning - that just brought tears to my eyes. I'm so glad my work has made a difference in someone's life...that means a lot to me!

Well I'm off to the studio to make some cross pendants - which I have requests for from some people last night. I'm coming up with my own unique design shape and going to make a few of these up to offer on my website as well as take down to the gallery next week.

Jai

P.S. I'm also working on painting #4 in my miniatures series "100 Fabulous Felines" this weekend. :)

Friday, November 25, 2005

What's my Motivation....what makes me work so hard and what keeps me going?

I also thought of an answer - or several - to the above question after answering those other questions below.

What motivates me to work so hard?

The empty refrigerator on Thanksgiving Day.
The utility guy leaving the yellow sticker on my front door.
The people who teased me when I was a kid.
People who resent the fact I won't play the games they play.
The people in my life who told me I should be a secretary and not an artist.
Those who brush me off and act like I don't exist.
The fact I want to leave a piece of me behind, to prove to future generations I was here...I did exist.
The people who act as if what I do is "easy" and claim how they can do the same thing with half the effort.
People who act as if I'll never amount to anything or who imply I'll never accomplish anything.
People who infer because my materials are relatively inexpensive, my art and jewels should be priced like something on a Wal-mart shelf.
People who indicate my time is not valuable.
People who try to yank me down as soon as I start to excel.

Those are some of the personal things in my consciousness which motivate me to work hard...to prove to all those people in my life that I am worthy, I do have talent, and I can bring beauty into this world in my own way.

It's also me proving to the world that a person CAN do what they love and can pay the bills. For years I worked in something I hated (yes, I did what I was told and became the secretary while I secretly dreamed of working in something more artistic), and it feels good to show those people - "hey look...I am doing what I want now (after a 20 year delay!) and guess what? I'm earning money!" Sure, it's tough to pay all the bills on time sometimes - but like I mentioned, the empty fridge and the utility folks knocking at the door motivate me to work harder, to try harder, to reach out to more audiences, etc.

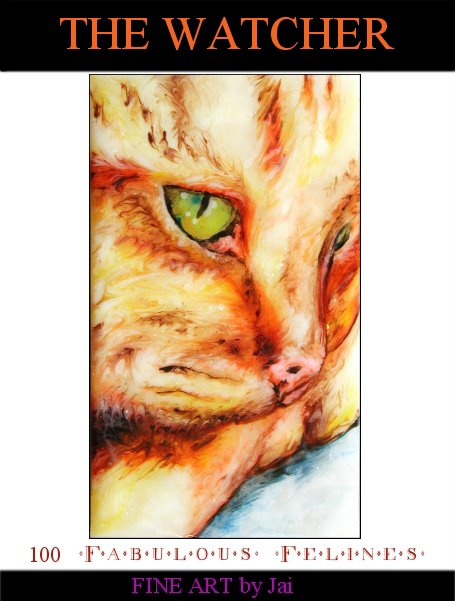
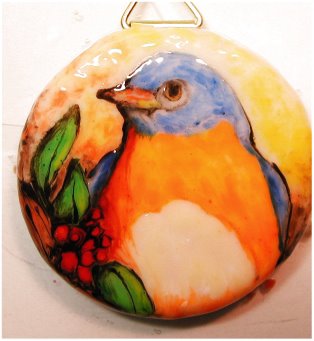
Notice in my motivation list...it all centers around "people". The humans in my world. Which is why I paint mostly animals, nature, scenery, birds in my work. To me, those things bring peace into a world where I've constantly been subjected to the above "messages" directed at me from people.

Most of the non-supportive and negative people are now gone from my life. I've learned to get away from anyone directing those messages at me relatively quick now. I know when I do that, some people wonder why I've just disappeared from their life. But there's really no point in explaining it - I've tried that and they don't get it or they deny it. The fact is, no matter what THEIR intention, that is how *I* felt and I had to make a decision to leave the situation for my own good. And I've never regretted it. Every time I step away from negativity, things improve for me. So I'll continue to do it....step away when it comes.

Some little known facts:

My first artistic piece was featured on Romper Room when I was 5 years old.
My first illustrated book was published by my school (Barrett's Elementary in Missouri) when I was 10 years old. The book name was "The Mischievous Raccoon".
My short story "The Champion She Dreamed Of" (about a horse) was accepted and published in my junior high school annual book of stories, poems and art when I was 14.
I worked at a restaurant as a waitress my first year in college and earned enough money just in tips in under 2 months to buy my first car myself.
I obtained a degree in Office Management from Freed-Hardeman University in 1986.
I worked as an accountant, office manager, and marketing director for over 15 years.
I have written and published articles, short stories, greeting cards, and a trade paperback novel, as well as several non-fiction instructional ebooks.
I have been fascinated with cubic zirconia since I was 13.
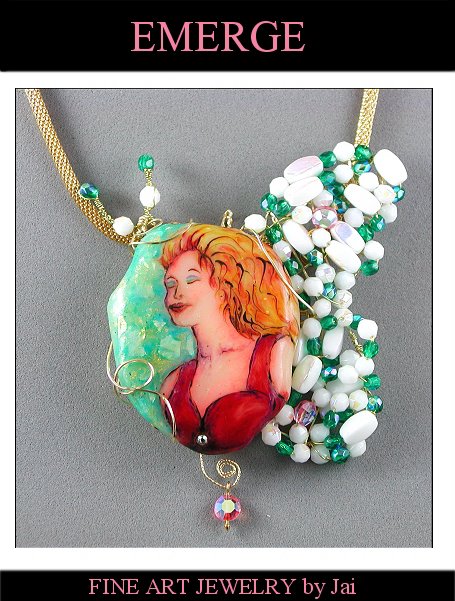
I've been making jewelry since I was 14.
Oprah owns a piece of my jewelry, and two of my bracelets were presented to the Mrs. Universe winners a few years ago.
I have extensively studied metaphysics, herbs, and alternative healing, and have published two ebooks in the field - "Healing With Color" and "The A Good Life Course".

Jai

What's Your Inspiration...Are you Married...Do you Have Kids & Pets?

Someone wrote me this week and asked me these questions...so I thought I'd share my answers here for the rest of you who are interested:

What is the inspiration behind your beautiful work?

My inspiration comes from color. I love color, and I tend to see colors in everything - colors most people don't see when they view something. So I tend to try to really bring out those colors in my work, which then helps people who see my art, see colors they wouldn't normally see, when say, looking at a dog or a cat or a landscape scene. Color makes things more vivid and bright to me, and in a world that is so often gray and negative in attitude, I want to bring more color into my own world as well as the world of others.

Are you married?

Yes, I am married - unfortunately for him. He might have been expecting Betty Crocker/Susie Homemaker/Soccer Mom, but he got me, the tempermental, totally focused artsy person who doesn't like anything "normal" - everything must make a statement. :)

Do you have children and pets?

I have two children and I have 6 pets, currently. I have 2 birds, 3 cats, one very spoiled dog, and I also seem to attract every stray in the world, so I have visitors frequently. I also have a stables I go to once a week and I get to be around the horses - they aren't mine, but I feel like they are in a way. Not to mention the gazillion birds, squirrels, and even a snake or lizard every now and then. And recently a bat visited as well. (that one I can do without!)

Jai

Wednesday, November 23, 2005

SUNBATHIN' - #3 in the 100 Fabulous Felines Miniature Cat Art Series


SUNBATHIN' - #3 in the 100 Fabulous Felines Miniature Art Series by Jai Johnson

"Bath? I didn't just hear her say that evil word. No way am I getting dumped into that big white abyss to be covered with - egads - water...soap...perfume. It's just NOT happenin'. Not in this lifetime. Yeah woman, I hear you calling me. When will you figure out I don't answer to 'kitty kitty'? And since I heard the "B" word in your last sentence, you won't see me for hours. You'll never find me up here...never. I'm takin' the best kind of bath there is, right here, right now. Dream on, Lady. Water baths are for humans...gimme the sun, Baby, gimme the sun!"

(click here to buy SUNBATHIN' from my gallery or click here to bid on SUNBATHIN' on Ebay)

Jai

P.S. Visit JAI Art International - to order prints, cards, and stamps with this artwork.

Tuesday, November 22, 2005

THE WATCHER - #2 in the 100 Fabulous Felines series of miniature cat art


THE WATCHER - #2 in the 100 Fabulous Felines miniature art series by Jai Johnson

"My owner's a trip. She's on the phone again to her sister, braggin' on me, telling her what a good kitty I am sitting on the porch watching for bugs, making sure none of the unsavory creatures slip under the door. She doesn't have a clue. Woman, I'm not watchin' for bugs...I'm checking out the chick sitting down by the rose bush. Mmmm...she's a sweet, fluffy gal. I love the way her silky tail curls around those back legs and how those long, white whiskers glisten in the sunlight. Talk about temptation... Bugs...ha! Get your own bugs, woman...I'm busy!"

(click here to buy this art from my gallery or click here to bid on this art on Ebay)

Jai

P.S. Visit JAI Art International - to order prints, cards, and stamps with this artwork.

Buffalo Art Jewel, Custom Order for a man!


This is a custom order art jewel as a gift for a man. His office is filled with wildlife art - paintings, sculptures, etc. This will hang on an ornament stand and sit on his desk to give him a piece of miniature art he'll really enjoy (he is a BIG buffalo lover). I hope he likes it!

Jai

Monday, November 21, 2005

STUCK # 1 in the 100 Fabulous Felines Mini Painting Series


STUCK Original Cat Miniature Polymer Painting #1 in the 100 Fabulous Felines Series of Miniature Polymer Paintings by Jai Johnson

"I'm not really stuck...but I look pretty convincing, don't I? When she sees my head wedged in between these wooden stair rails, she'll race over here, frantic. Then she'll try to maneuver me out of this position, calling me 'poor baby' the entire time. I'll whimper a little and maybe give out a good yowl, and eventually I'll let my head ease from between the rails. Then I'll shake viciously and start grooming myself while she goes to get my cat treat to appease me for my misfortune. She'll spend the afternoon holding me and cooing over me. I tell the others all the time...ya just gotta know how to work 'em. Owners are trainable."

(Click here to buy STUCK from my gallery or click here to bid on STUCK on Ebay. First one to get to him takes him home!)

Jai

P.S. Also visit JAI Art International - to order prints, cards, and stamps with this artwork.

Saturday, November 19, 2005

My new Ebay ID & new series thoughts

You know, sometimes it just takes me a while to "get it"...why I had my user id anything other than my name, I have no idea. Anyway, I just changed it and now my user id is officially:

jai_johnson

on Ebay. How's that for easy to remember? LOL

Today I am beginning a new series.....this is a series of miniature PAINTINGS. No, these cannot be worn as pendants, as my other pieces you've been seeing. I'm taking on a HUGE challenge to complete a series of miniature paintings - 100 of them to be exact. The series name is "100 Fabulous Felines". Each miniature painting will be completed in polymer, using my own techniques. Each piece of tiny art will be size 3 1/2" x 2" - the size of a business card.

The reason I chose the business card size for my painting series is because of the magnetic business card deals you can put on the back. *Some people* might like to display their original art purchases on a refrigerator, metal cabinet, or metal board on their wall. I'm not putting any magnetic material on the back - display is up to the buyer because everyone has so many different preferences on how they like to display their original minis. It's just the size I am making them will work well with those magnetic backings if the buyer chooses to do that. They can also be mounted in other ways - frames/mats, displayed on tiny easels, etc. These will not have any hardware attached at all, as my art pendant/hanging paintings do.

Each piece in the series will be prepared on a "canvas" of translucent polymer clay (giving them the look of stained glass when placed in front of light). Each painting will be signed with my official JAI stamp and numbered (ex. 1/100) on the bottom edge of the canvas. My art jewels I sign on the back. These will be signed on the bottom edge of the canvas on the front, just in case someone wants to put mounting material on the back - that way it will not hide the signature or #.

I'm looking forward to getting started on these cool cats. Why cats? Well I own several, I love them, and they have such interesting expressions and body language. Not that my other animals don't...it's just cats get themselves in more unique "positions" I guess, therefore creating a variety of poses and looks which make appealing works of art. And this is just my first series...who knows what the next will hold!

Oh, and each piece will be offered on my website for $85 - $120 and will be listed on Ebay as well. I am *thinking* of (though I rarely "cut prices" for Ebay anymore) opening bids of only $49 on these and hoping the bids will go up. The ONLY reason I'm considering that is to keep my Ebay fees down, which are getting quite excessive from listing $65-$85 pieces on there recently in an attempt to reach out to new audiences. But I haven't decided for sure. I do know I'll run these just like I do my other pieces....if they sell on the site before there is a bid, they get pulled from Ebay. If they get a bid, they get marked sold on the site. Whoever gets there first secures the piece, basically.

So that's what I've been up to this cloudy, cold Saturday here in Jackson, TN. Thinking....planning....adjusting things.

Jai

Friday, November 18, 2005

Custom Order Rottweiler Mix Art Jewel


This is a custom art jewel I created this week featuring "Beau" a Rottweiler Mix. Below is the reference photo I worked from for this piece.

Go here to see more examples of designs I've done: Custom Page

Custom Order Chihuahua art jewel


This is a custom order Chihuahua art jewel I just completed of a sweet little light colored pup named "Pookie". Below is the reference photo I worked from to create this design.

Wednesday, November 16, 2005

Bluebird in the Holly - Completed Design!


The glaze is still a bit damp, but I managed to get him photographed tonight! Total time invested = 7 hours. Looking below, you can view the posts detailing his creation in reverse order. Alternatively, you can click this link and see the posts in order from start to finish.

Bluebird in the Holly is now available for sale on my website and on Ebay. If he sells from my site first, he gets pulled from Ebay. If he gets a bid on Ebay first, then he gets marked on hold on my website. Basically, whoever gets to him first takes him home. He is a one of a kind, original work of art, as you can see from my demonstration below. I hope you enjoyed watching his evolution!

Tomorrow it's back to my custom orders...I have several of some SUPER SWEET PETS to fill! :)

Jai

The Making of a Bluebird Jewel #6


Here I've added "feathering". The photos get somewhat saturated in color now, as so much rich color is being added to the jewel. I'e added blue to his head, terra cotta to his breast, and a little terra cotta on his lighter, underbreast.


Here I have added a little yellow overall to brighten him up. When I add feathers, I use my smallest brush and just add them sporadically over the entire design. Then I "pull" feathers out around his outer edges using an empty brush. Notice his head...the difference between the previous photo and this one. His feathers look like they are sticking up a bit, which they were from our winds we are having today.

Here I've refined his body overall - with some cream feathering, especially on the lighter underbreast. I've worked on his beak some more. I've deepened the shading on the leaves and branch. And I've added the white dot to his eye which brings him totally to life! He looks done, but there is something that's bugging me between his orange colored breast and the cream underbreast.


Aha.....it's not defined enough! Time for a little black. I add a bit of black in various places between the two breast colors, and this further defines things in that area. He's ready for the oven, and it's time for me to eat lunch! YEAH!

Note: While the defining details in black might look a bit TOO defined here, keep in mind, this piece is still wet and when he is fired in the oven, the colors "meld together", the layers on top blend with the bottom layers and it all creates a very realistic design.

After he comes out of the oven, I will put his first coat of glaze on while he's hot. This sets the glaze nicely. Then he will receive 2-4 more coats of glaze on the front of the design, which gives him the glassy like shine I like to see in my pieces. The next photo you'll see will be the finished piece, photographed a bit more professionally than these in this production.

At this point, I have 5.5 hours in the design, and it will probably have another 1 hour before completion. There is time needed for the glaze to dry totally, so I won't be able to show his finished photo until this evening.

Jai

The Making of a Bluebird Jewel #5

In this photograph, I have laid in the cream colored background. I have also detailed the branch by adding terra cotta and black outlines/lines to the gray base. I have defined the holly berries by encircling them in black, and have defined the leaves as well with black outlines. Keep in mind, my light source is coming from the right, so I added a little yellow to the right side of the leaves and darkened the leaves a bit more on the left.


This photo shows where I've now added more color to the background. Small bits of terra cotta were applied up the left edge and down low on the right. Golden yellow was applied up the right side and over the top of the bird's head. Then very close to the branch, leaves and base of the bird, I have added black to further darken these areas. I have also outlined the two sides of the bird to define him better.

In this last photo of this set, I have worked on the beak area a little more. I have also began darkening his feathers under the left wing to show the shadowing. And I have darkened his left wing with a deep navy blue to show its shadowing as well.

Now it's time for the rest of his detailing. I'm starving...but I'm going to get the rest of his coloring done and get him in the oven before I eat! :)

At this point, another hour has been invested. 4 hours and 15 minutes so far.

More later,
Jai

The Making of a Bluebird Jewel #4

Here I have began the detailing of the bluebird's beak. I filled in over the white with gray, added some terra cotta and yellow, and outlined in black to define the beak.


Here I have began the coloring of his head feathers with the rich cobalt blue. I've also colored in his wings. Now he's starting to look a little like a bluebird!


Here I've add more of the darker base coloring over the light colors. His breast is becoming more orange/rust colored, his underbreast feathers have cream added to them. I've defined the branch with some gray and green, added dark green for the leaves and added the red for the holly berries.

Now it's time to decide on background color. I believe I will use cream as the base, with yellow on the right hand side of the bird (this is where the sun will hit his feathers) and a terra cotta on the left (causing his left side to be slightly shadowed, with darker coloring.) It's also time to start detailing his feathers with some darker, defining colors to suggest separation.

At this point, there has been another hour into this project, making it a total of 3 hours and 15 minutes so far.

More soon!
Jai

The Making of a Bluebird Jewel #3

These are my paint vials - each filled with various colors of tinted liquid clay. This is what makes up the colors in my designs. Those are 3 of my favorite brushes - all are VERY small!


The first thing I always do when painting an animal, bird or person, is create the eye(s). The expression in the eye(s) must be right for me to continue. It's like the eye looking back at me suddenly brings the art "to life", and once it becomes real, I become personally connected with the subject. I'm connected now with this little fella - he has my full attention!


Here I have layed down the lightest undertones of color in the design. Though I will add darker colors over these lighter ones, by doing this stage first, the piece will end up with a realistic glow. You might notice the holly berries are orange in this photo. That's because although at first glance, the berries just seem red, they actually have an orange cast to them. By adding the orange as the base color for the berries, I'm hoping to be able to recreate the look of the real berries.

Now I'm lucky....the holly bush is right outside the window and I can glance up and view it as I go. The bird is gone, of course, but I've painted numerous bluebirds before, so I believe I can guess at his coloring enough to create a realistic version of him. :)

At this point, I haven't painted in a background color because I haven't decided what color I'm going to use yet. I could go ahead and fire the piece now, and add the additional colors in layers over the top - however, since my bottom layer is still so very thin (notice you can still see my pencil marks through the color), I'm just going to let the piece sit for about 30 minutes and let the color set without firing.

So what do I do in the 30 minutes while the piece is resting? I could eat breakfast...I could take a walk...I could work on my next design. However, since I really want to do a good job on the bluebird, I think I'll glance over photos of bluebirds just to make sure I get his coloring and markings realistic enough. :)

Just in case you're curious, so far, I have 2 hours and 15 minutes in this project. (I began at 7:30 am with the first sketch, and it's now 9:45)

More later!
Jai